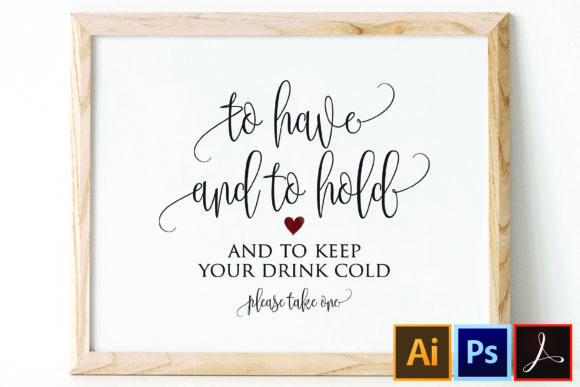
To Have and to Hold Wedding Koozies, PDF: A Practical Guide for Custom Drink Accessories
Planning a wedding involves thousands of small decisions, from the floral arrangements to the seating charts. Yet, one often overlooked detail that can significantly impact guest experience is the drinkware. To Have and to Hold Wedding Koozies, PDF offers a streamlined solution for couples who want personalized touches without the high cost of custom manufacturing or the hassle of coordinating with multiple vendors. This template is designed to be the bridge between your creative vision and the final printed product, ensuring your beverages stay cold while your branding stays consistent.
However, simply downloading a file does not guarantee a perfect result. Many creators and event planners rush into printing without understanding the nuances of vector graphics, color modes, and file formats. These oversights can lead to blurry prints, mismatched colors, or files that simply won't open in professional software. To ensure your wedding koozies look as polished as the rest of your celebration, it is essential to understand exactly what you are getting and how to prepare it correctly.
Understanding the File Formats: Why Three Options Matter
The To Have and to Hold Wedding Koozies, PDF package stands out because it provides versatility through three distinct formats: Adobe Photoshop (PSD), Adobe Illustrator (AI), and Encapsulated PostScript (EPS). While this might seem like redundancy, each format serves a specific purpose depending on your technical skill level and the tools you have available.
A common mistake is assuming that a single file type works for every scenario. If you are a graphic designer using industry-standard software, the AI and EPS files are your best friends. These are native vector formats, meaning they rely on mathematical equations rather than pixels. This allows you to resize your design from a tiny label to a billboard without losing any quality. Conversely, if you are using a simpler photo editing tool or need to manipulate layers quickly, the PSD version is invaluable. It preserves the layer structure, allowing you to change text, swap images, and adjust colors independently.
When evaluating these options, remember that the goal is flexibility. By offering all three, the template ensures that whether you are a seasoned pro or a beginner using a basic editor, you have the right tool for the job. Do not settle for a low-resolution JPEG or a locked PDF; those will limit your ability to correct errors before sending the file to print.
Navigating the Editable Elements Correctly
One of the most critical aspects of this template is the distinction between editable vectors and non-editable text elements. The documentation explicitly states that all graphics and design elements are fully editable vectors, but it warns that the text itself is not always editable as standard characters. Instead, the text is often converted into shapes or outlined paths within the vector layers.
This is a frequent source of confusion. Beginners often try to click on the text and type over it, only to find they cannot change the font or spelling. If you encounter this, do not panic. You must use the selection tools to move, scale, recolor, or delete the text shapes entirely. If you need to change the wording, you may need to create new text layers or replace the existing shape with a new one using your own font.
Practical Tip: Before you start editing, take a moment to explore the "Layers" panel in your software. Identify which layers contain the text shapes and which contain the decorative elements. Understanding this hierarchy prevents frustration and saves hours of troubleshooting. Remember, the instruction that text is not editable refers to the character properties, not the ability to modify the visual representation of the words.
Common Pitfalls in Preparing Your Design
Even with a high-quality template, the final output depends heavily on how you handle the pre-press process. Here are several common errors that can ruin a print run and why avoiding them is crucial for your budget and timeline.
- Ignoring Color Modes: Screens display color in RGB (Red, Green, Blue), while printers use CMYK (Cyan, Magenta, Yellow, Black). A vibrant neon green on your monitor might appear muddy or dull when printed. Always convert your working file to CMYK before finalizing the design to see a realistic preview of the colors.
- Overlooking Bleed Areas: When printing on physical items like koozies, the design needs to extend slightly beyond the cut line. If you place your text or graphics too close to the edge, the cutting machine might slice off part of the lettering. Ensure your design includes a proper bleed margin, typically 0.125 inches, to account for manufacturing variances.
- Using Incorrect Fonts: The package mentions free fonts are included. However, if you download these fonts but fail to install them correctly on your system, your software will substitute them with default fonts. This changes the kerning, spacing, and overall look of your design. Always verify that the fonts are installed and active before saving your final file.
These mistakes are not just cosmetic; they can lead to rejected print jobs, extra fees for reprints, and delays in your wedding schedule. A blurry logo or a cut-off name on a koozie sends a message of carelessness, which is the opposite of what you want for your special day.
Evaluating the Template Before You Commit
Before purchasing or downloading the To Have and to Hold Wedding Koozies, PDF, take time to review the image previews and specifications provided by the seller. Look closely at the resolution of the sample images. Are the lines sharp? Is the text legible? Does the layout accommodate the dimensions of a standard 5"x7" koozie?
It is also wise to check the compatibility of the software versions. An AI file saved in a very recent version of Illustrator might not open in older versions of the software, which could be a problem if you are sharing the file with a print shop or a friend. Similarly, ensure your version of Photoshop supports the layer effects used in the PSD file.
If you are unsure about your technical capabilities, consider testing the template with dummy text first. Create a mock-up of your wedding details, such as names, dates, and hashtags, and see how the design handles the changes. This trial run helps you identify potential issues with spacing or readability before you commit to the actual content.
Maximizing Value with Free Resources
The inclusion of free font download links is a significant value-add. Many templates require you to purchase additional assets, which drives up the total cost. However, relying on these free resources requires diligence. Verify that the license for the included fonts allows for commercial use or personal use, depending on your needs. Some fonts are restricted to personal projects only, and using them for a large-scale wedding print run could lead to legal complications.
By carefully managing your fonts, colors, and file settings, you transform a simple template into a professional-grade asset. The To Have and to Hold Wedding Koozies, PDF is ready for print, but it requires a user who understands the basics of digital design to unlock its full potential.
In conclusion, success with this template lies in preparation and attention to detail. Avoid the trap of treating digital files as static images. Treat them as dynamic projects that require careful management of layers, colors, and vectors. With the right approach, you can create stunning, personalized koozies that enhance your wedding atmosphere and provide a lasting memory for your guests, all while staying within budget and avoiding costly printing errors.